Are you running a sale in your shop? Do you want to share the discount coupon code and let your visitors know how long the sale is running?
Do you want to remind your visitors to register for an event?
These are only some examples. To get this done, you must add an announcement bar/notification bar/promo bar/message bar with a countdown timer.
In this article, I’ll show you how to use the Announcer WordPress plugin to set up a message bar with a countdown timer.
Why add a Countdown Timer?
When you add a countdown timer to the announcement, users are reminded that the offer/sale/discount/event is for a limited time.
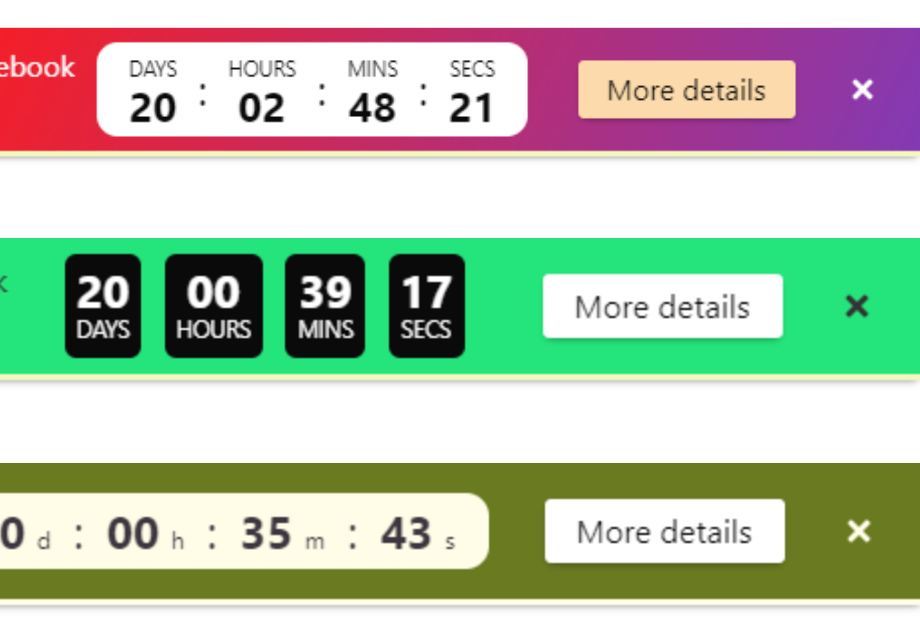
It makes your visitors engage and take an action quickly. This in turn excites the users and drives more sales.
Visitors feel the FOMO (Fear Of Missing Out) during the flash sale period.
Adding the Announcement Bar
We will be using the Announcer PRO plugin to add the announcement bar. The PRO version of the plugin checks all boxes of features. The free version of the plugin is actively used on 5,000+ websites.
The first step is to get the plugin and download and install it. Learn more about download and installation on the documentation page.
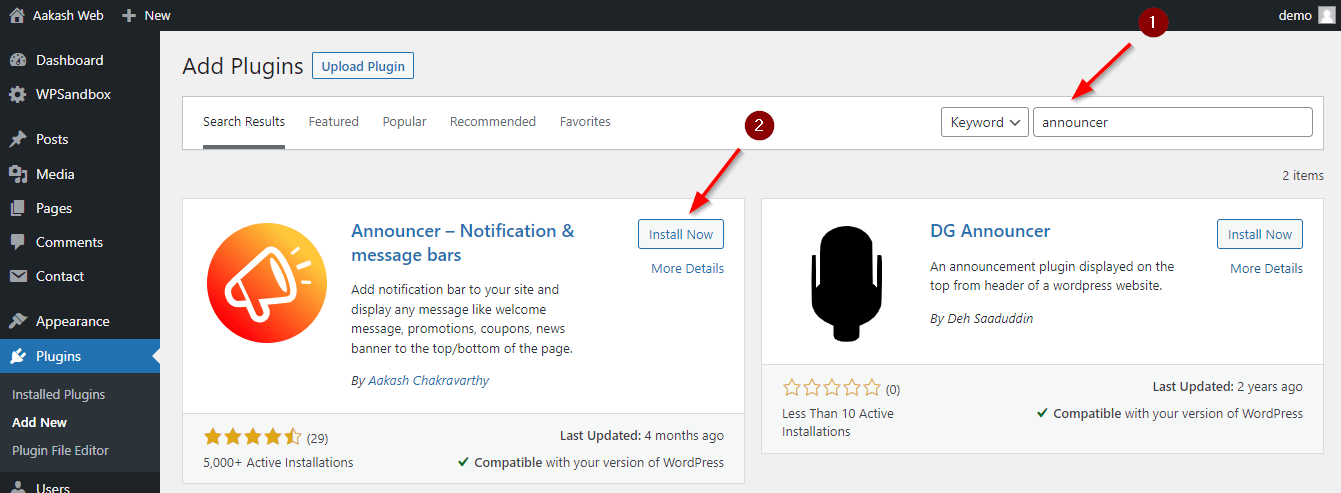
After installing and activating the plugin, head over to Announcer > “All announcements” page > “Add announcement”.
Give a title for the announcement and enter the announcement message in the message box below the title.
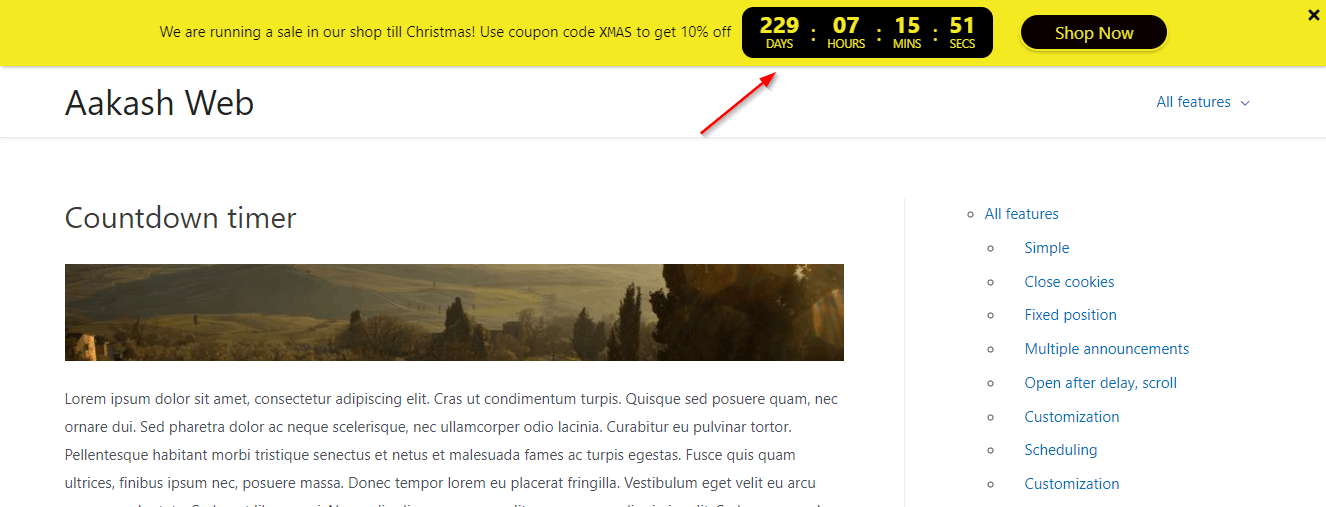
You can give a message like “We are running a sale in our shop till Christmas! Use coupon code XMAS to get 10% off.”
Under the Settings section, go to the “Call-To-Actions” tab and add a button. We need to add a button because that is the only way a user can take an action.
Give a name for the button and add a URL to the button. For example, The show now buttons with a link to the Shop page.
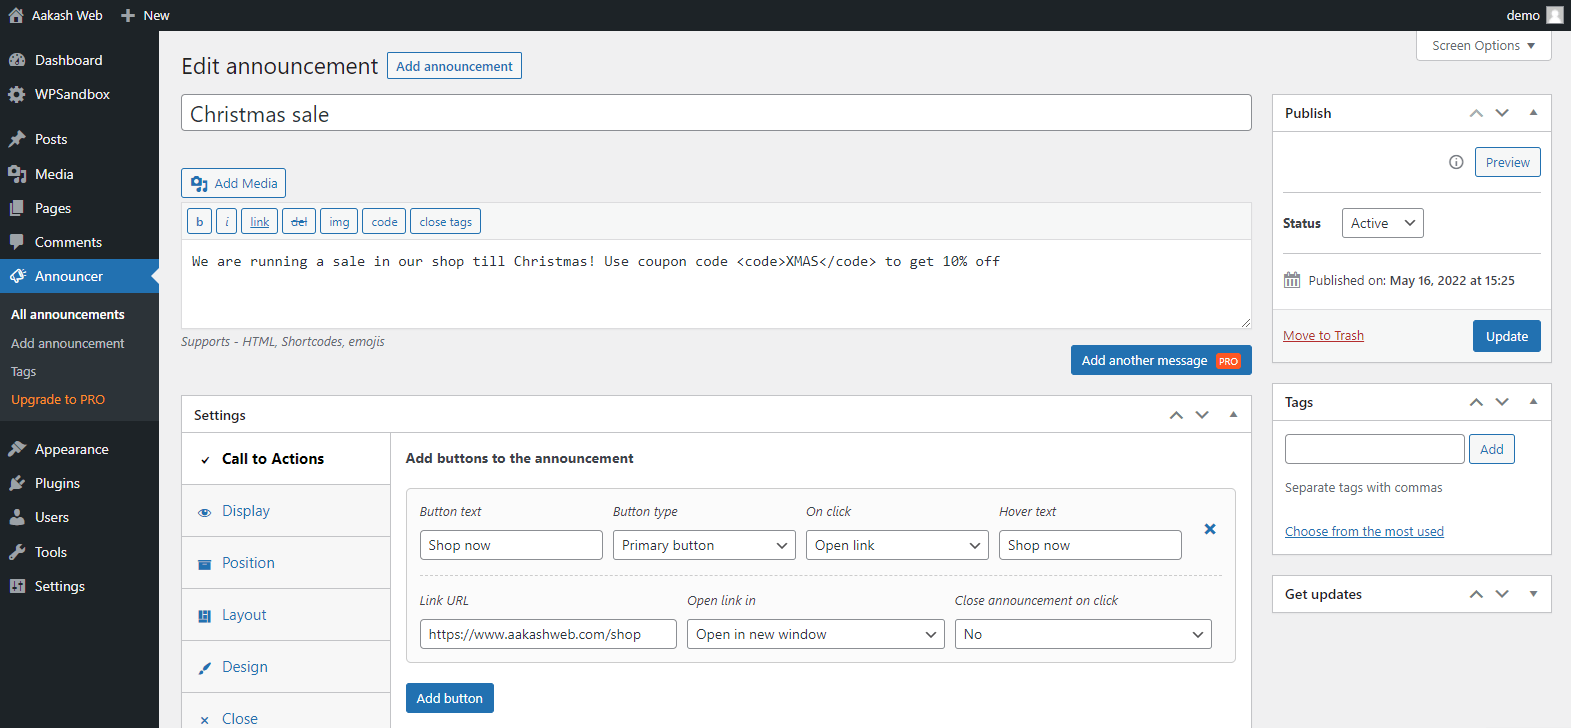
You can continue to configure how you would like to display the announcement bar i.e. position, style, colors, pages to show, etc. under the settings section.
Hit publish and save the announcement bar.
Adding a Countdown Timer to the Announcement Bar
We have now added an announcement bar. Let’s continue to add the countdown timer.
Switch to the “Countdown timer” tab under the Settings section.
In this tab, set “Enable countdown timer” to “Enabled”. Select a date and time for the count down.
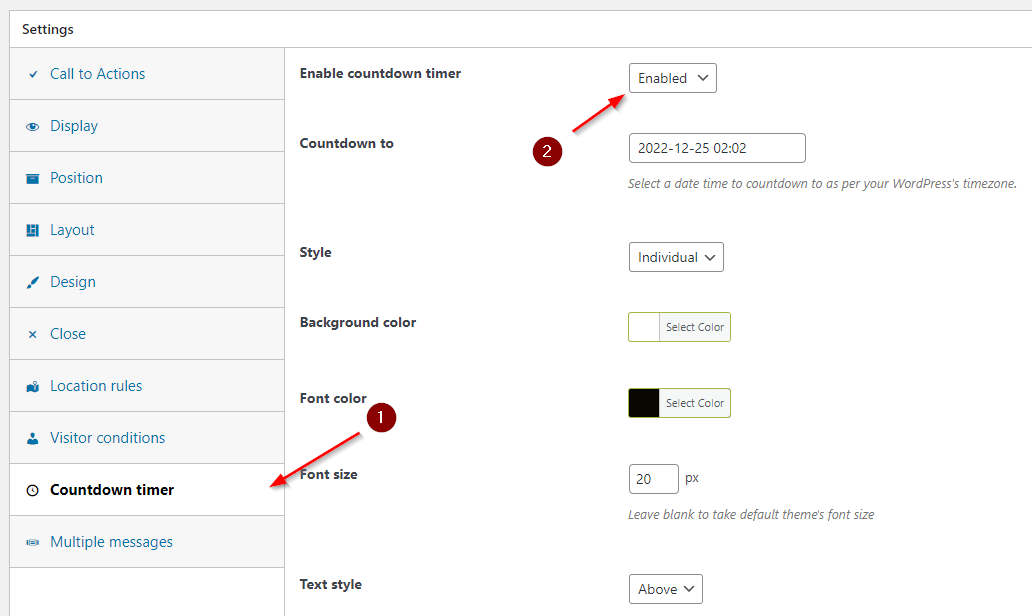
That’s it! Save the settings and you can find the countdown timer added to the announcement bar.
Your visitors can now see the message and a timer indicating how long the event you have mentioned is valid for.
Conclusion
In this article, we added an announcement bar with a countdown timer using the Announcer PRO plugin in a few steps easily.
If you have any comments, please share them in the comments box below.
Add your comment No Comments so far